
No products in the cart.

X-carriage assembly
here, all same as workbee instructions
Items you need for this step:
 | 1 | Z plate |
 | 1 | X plate back |
 | 1 | X plate front |
 | 20 | v wheel assembly from previous step |
 | 6 | M5 low profile 30mm screw |
 | 9 | eccentric spacer 6mm |
 | 9 | 6mm aluminium spacer |
 | 16 | mini precision shim |
 | 15 | M5 nylon insert lock nut |
 | 2 | ACME nut block (may look different then in the picture) |
 | 1 | ACME nut block (may look different) |
| 6 | M5 low profile 25mm screw |
 | 1 | NEMA23 stepper motor |
| 9 | 9mm aluminium spacer |
| 7 | M5 low profile 60mm screw |
Attach 6 V wheel assemblies to the Z plate with 30mm screws – and at one side of the plate, use 6mm spacers with a precision shim, whereas at the other side, use eccentric spacers with a precision shim:

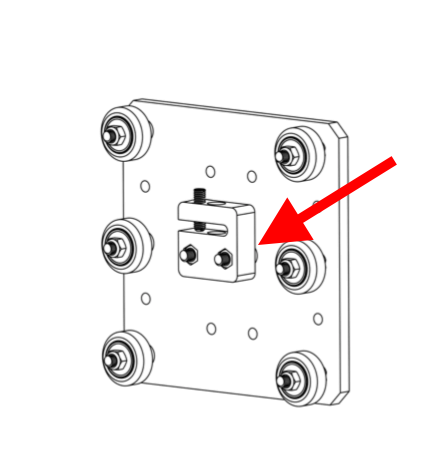
Then, attach the Z axis nut block:
Use 25mm or 30mm screws to attach the nut block – and position 3mm spacers between the nut block and the Z plate, as highlighted with the red arrow. Use M5 lock nuts to secure the screws and nut block.
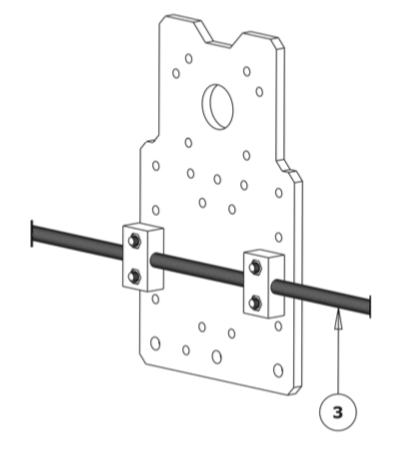
Now, we shall attach the nut blocks for the X axis leadscrew:
Use 25mm screws to attach the nut blocks – there is M5 tapping in the nut blocks:
Attach the wheels and X front plate now , in the same way as you did for the Y axis plates:


Now is also a goo moment to attach the Z axis limit switch as it’s easier to reach now:

And attach the Z plate to the X front plate with 20mm screws:


And add the Z axis extrusion:


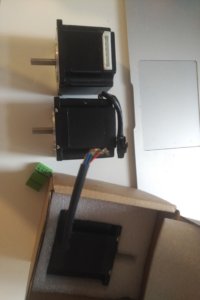
And the Z axis motor and leadscrew:

With 40mm spacers and 50mm screws:


